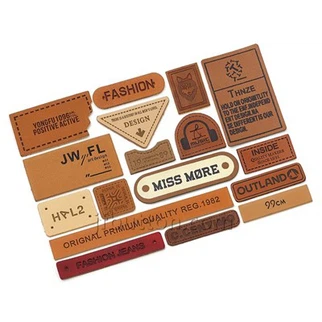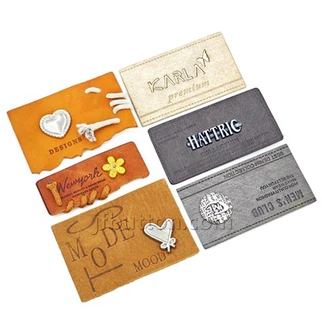
הדפסת תוויות מכסה מספר שיטות הדפסה עיקריות, בשלב ייצור הלוחות. בהתאם לאופי של מוצרים שונים, שיטות הדפסה שונות נבחרות, ותהליך יצירת הלוח- שונה גם עבור שיטות הדפסה שונות. מאמר זה לוקח את תהליך ייצור הלוחות הפלקסוגרפיים כדוגמה להקדמה קצרה.
זרימת התהליך של ייצור לוחות פלקסוגרפיים הוא כדלקמן: כתב יד מקורי-סרט (סרט שלילי)-חשיפה-שטיפה-ייבוש-פוסט{{5 }}מעבד.
1. מקורי. העיצוב המקורי המתאים להדפסה פלקסוגרפית צריך להיות בעל המאפיינים הבאים: מספר רב של צבעים. אבל הדפסת היתר פחותה; אין צורך לשחזר פרטים קטנים במיוחד; כבל הרשת אינו גבוה מדי, אך ניתן להשיג את אפקט ההדפסה הצבעונית; ניתן לארוז אותו באינטרנט.
2. סרט (סרט נרתיק). הוא עונה על הצרכים של ייצור צלחות, עם תמונות וטקסטים ברורים, ומפרטי גודל וגודל מדויקים; באמצעות סרט חלבי, ארבע פינות הסרט נדרשות להיות בעלות אותה צפיפות; שימוש בכתיב סרט הסמים; באמצעות צפיפות שידור, צפיפות הרמה הלבנה נמוכה מ-0.06; צפיפות רמת השחור היא מעל 3.5.
3. החשיפה כוללת חשיפה לאחור וחשיפה עיקרית.
① Back exposure. The photosensitive resin plate with the support film up and the protective film down is laid flat in the exposure drawer for exposure. Ultraviolet light penetrates the support film to cure the photosensitive adhesive layer. In order to establish a stable base, it can also control the depth of plate washing and strengthen the bonding force between the support film and the photosensitive resin layer. The back exposure time is determined according to the desired substrate thickness.
②Main exposure. Also known as front exposure, the photosensitive resin plate support film faces down and the protective film faces up. Tiled in the exposure drawer. Tear off the protective film once in a row, and then stick the film surface on the photosensitive resin plate. The inspection method of the vacuum film is covered on the film (non-drug film is evacuated, so that the film and the photosensitive resin layer are closely attached. The ultraviolet rays pass through the vacuum film and the light-transmitting part of the film to make the plate photosensitive Partial polymerization and curing. The length of the main exposure time is determined by the type of plate material and the strength of the light source. If the exposure time is too short, the gradient of the graphics and text will be too straight, the lines will be curved, and the small characters and small dots will be washed out. Otherwise, the exposure time will be too long. , the handwriting is blurred. If there are big, small, thick and thin lines on the same printing plate, it can be covered with black film and exposed separately according to the situation. The small part will not be lost due to washing, so as to ensure the quality of the printing plate.
4. לשטוף. החלק הלא-רגיש לאור נשטף ומומס, והתבליט הפוטופולימרי נשמר. אורך זמן שטיפת הצלחת נקבע בהתאם לעובי לוחית ההדפסה ולעומק תבנית ההדפסה. אם זמן הכביסה קצר מדי, השרף הלא רגיש לצילום יישאר על הצלחת וישפיע על עומק הכנת הצלחת. ליפול.
5. ייבוש. הסר את ממס שטיפת הצלחת כדי להחזיר לצלחת את גודלה ועוביה המקוריים. טמפרטורת האפייה היא בין 50-60 מעלות. זמן האפייה נקבע לפי עובי הצלחת ואורך זמן הכביסה, בדרך כלל שעתיים לצלחת העבה ושעה לצלחת הדקה. אם זמן האפייה ארוך מדי וטמפרטורת האפייה גבוהה מדי, לוחית ההדפסה תהפוך לשבירה ותשפיע על חיי ההדפסה. אם טמפרטורת האפייה נמוכה מדי, זמן הייבוש יתארך, ואם זמן האפייה קצר מדי, תהיה גרסה רקובה במהלך ההדפסה.
6. post-processing. That is, de-sticking and post-exposure. Make the photosensitive resin completely harden (polymerize) to achieve the proper hardness index, and eliminate the viscosity of the printing plate, so as to facilitate the transfer of ink. The post-processing time is obtained from the test, and the purpose is to not crack or stick.